Google Workplace (formerly known as Google Suite) is a collection of productivity and collaboration tools that are popular among businesses of all sizes due to its convenience and ease of use. In fact, you might already be using one of the most popular ones, such as:
- Google Drive for storing files
- Gmail for email services
- Google Docs, Google Sheets, and Google Presentations for collaborating on different types of documents
But, fewer teams have used — or even heard of — Google Sites. After Google gave this tool a complete overhaul in 2016, it’s worth taking a look at for organizations (as well as individuals) that are interested in creating simple Google websites.
This Google Sites tutorial will take you through step-by-step on how to set-up and publish a basic website in less than an hour. However, before we dive into our guide, let’s take a deeper look at what Google Sites is.
What is Google Sites?
Google Sites is a free website-building tool that lets users create websites using drag-and-drop editing. It integrates with Google Workspace, allowing easy embedding of Docs, Sheets, and other Google tools. It is ideal for creating intranets, team sites, or small public websites without coding.
Google Sites is a convenient way to put together a web page or wiki page quickly — without requiring any IT skills, coding, or software installation. You don’t even need to have a separate domain name, as it becomes an extension of the Google Apps account you’re using.
Consider it the Google version of a “website in a box”-sites such as Wix and Squarespace.
So, how can you use Google Sites?
- Public sites. For example, customer service portals or simple business websites.
- Private internal website or internal wiki. For example, for project management or for use as an intranet.
What is the difference between a Google Site and a website?
The main difference between a Google Site and a website is that Google Sites is a simplified website builder within Google Workspace, while a website can be built using various platforms, technologies, and custom code. Google Sites limits customization but is faster for creating internal or basic public-facing pages.
Google Sites Features
Google Sites comes with a host of useful features, including:
- Google Sites templates with responsive design across devices
- Themes that give a coherent, designed look
- The ability to embed Youtube videos, images, and other content
- Tables of contents and expandable text for easy overview
- Integration with other Google Workplace tools:
- Add documents or sheets (Google Docs and Google Sheets)
- Display forms (Google Forms)
- Add map (Google Maps)
- Show calendar (Google Calendar)
- Tool for embedding code to the pages
- User access and visibility management
The Best Google Sites Templates
How do you want to use Google Sites? That’s the question to answer when choosing the best template for you.
Google Sites comes with several sleek-looking themes. Consider them starting points rather than ready-made sites, as you’ll most likely need to add plenty of content and pages to get the site you need.
Here are a few Google Sites templates we like:
The Portal Template

This Portal template is the Google Sites intranet template, aimed at businesses that need a very simple intranet. The template features a prominent search box to help users find the right information quickly.
You’ll also see boxes for adding more information, linking to a Google Calendar to show upcoming events. At the bottom of the template, you have lists where you can add links to important documents such as HR policies, resource groups, and company reports.
The Help Center Template
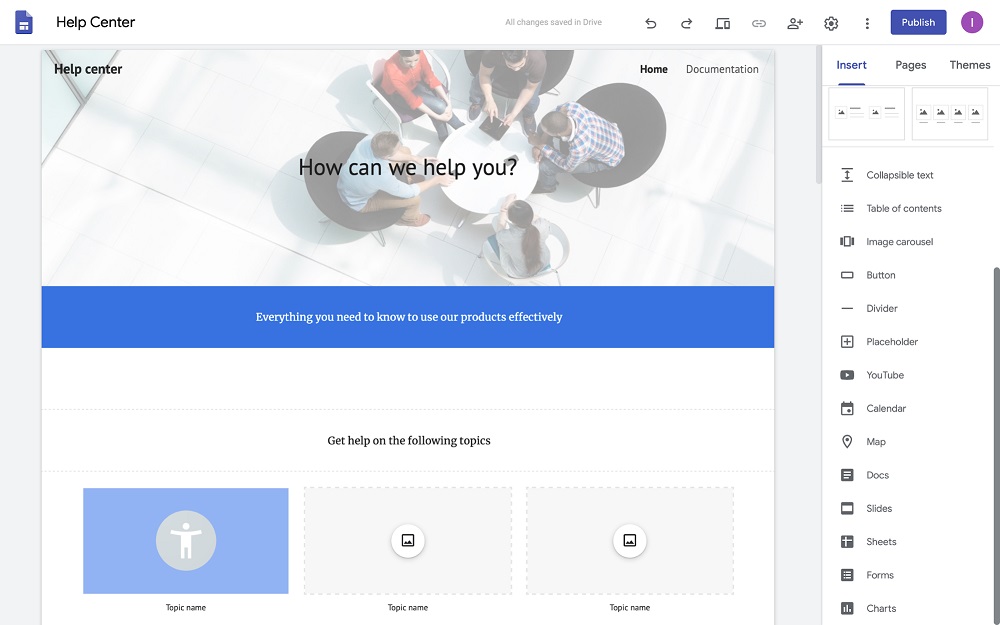
The Help Center template serves as a starting point for creating a customer-facing self-service portal. You can easily use sub-pages to group articles in categories that help customers to navigate to the right article.
The fields with collapsable text in this template allow customers to review the information little by little.
If you choose this template, we’d recommend that you add a search box to it, as it helps customers to find the right information quickly.
The Project Template
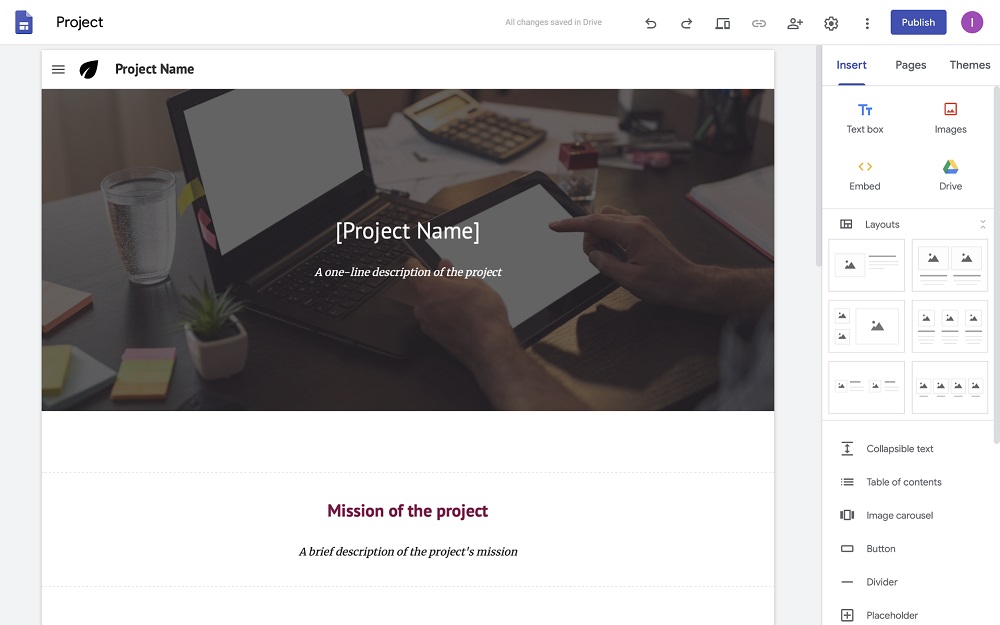
The Project template is practical for gathering all the necessary information about a project in one location. The template states the project mission and then highlights the key outcomes. Other template pages share more information about the team and their motivations, share the background, and list FAQs.
You’ll likely need to add more sections to make the site useful for your team, but the template is a convenient starting point.
The Benefits of Google Sites
- Free to use
- Intuitive tools that let you get started in minutes, without installing or downloading any software
- You can access Google Sites anywhere and from any device
- Integrated with other Google Workplace tools such as Google Docs, Google Calendar, and Google Maps
- Easy to edit and manage access
The Potential Drawbacks of Google Sites
- To share files to your Google Sites website, you first need to upload them to Google Drive, creating an extra step. You also need to manage all the access levels of the files to ensure that they are visible to the users
- Google Sites offers limited customization and functionality compared to other alternatives (you can use AI website builders to get more options)
- There’s limited integration with apps outside of the tools available via Google Workplace
How to Make a Google Website [Google Sites Tutorial]
The main thing to remember when you’re creating your Google website is that a bit of planning and preparation will make the setup process much easier and faster. When you’ve got your documents, images, and other content ready, you can make a simple site in less than an hour.
Here’s our step-by-step tutorial to get your new Google Sites website up and running in no time:
Step 1: Strategize and prepare content
Before you get started, there are three questions you need to answer.
Question #1: What’s the purpose of your site?
For example:
- Intranet — internal site to share news and events to inform employees.
- Customer service portal — FAQs, tutorials, information to solve issues, and reduce customer service inquiries.
- Project site — information, news, and documents related to a team project.
Once you’ve decided on the main job of your new Google Sites, you need a simple outline:
Question #2: What pages does your site need to deliver the necessary information?
Look closer to what your actual goal is with the Google Site that you are creating. For some sites, it may be enough with one long page. Other sites will be clearer with a structure consisting of several pages.
For example, a site dedicated to a project might need:
- Start page with an overview of the project.
- Team page with the team members and their contact information.
- Documents page with necessary policies, reports, and links to documents that are in progress.
- Goal page that breaks down the main outcome or outcomes into manageable goals.
Question #3: What content will you share on the pages?
It’s now time to gather and organize the content necessary for the site to fulfill this job. What text, images, and other content do you need?
As you’re using Google Sites, the natural solution is to use other Google apps for this, such as:
- Spreadsheets from Google Sheets
- Documents from Google Docs
- Presentations from Google Slides
- Forms from Google Forms
- Schedules from Google Calendar
- PDFs and other types of content from Google Drive
- Videos uploaded to Youtube (owned by Google) for embedding
You’ll also want to gather all the necessary images in a folder.
The main thing to remember in this stage? Configure the access permissions so that the users can interact with the files or calendar.
Step 2: Choose the Best Google Sites Template for You
You can create your site from scratch. However, Google Sites comes with several ready-made templates. It’s worth taking a look at them as they serve as good starting points for getting your site up quickly.
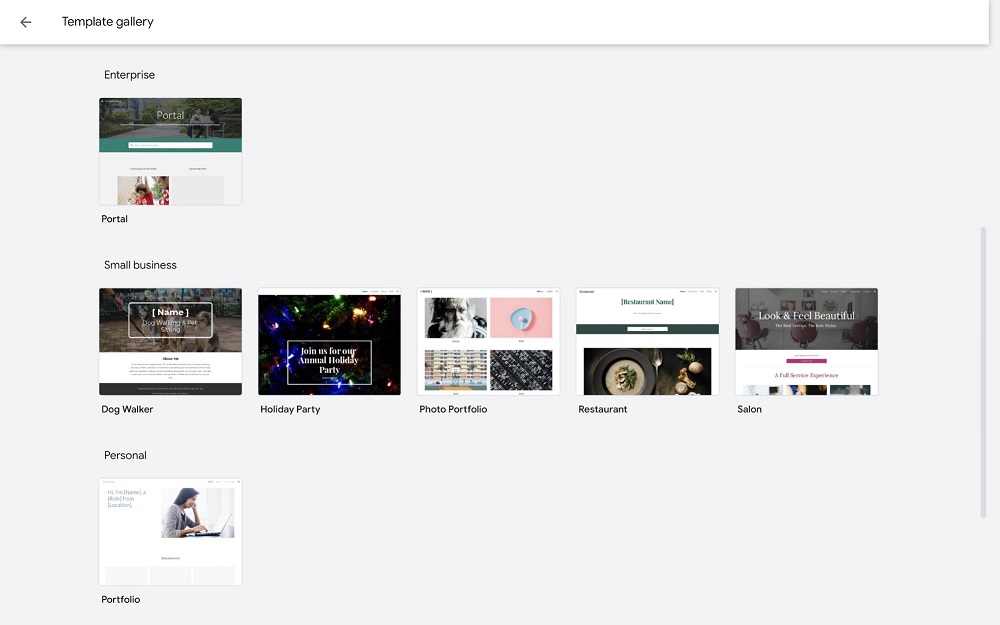
Click template gallery to see all of the Google Sites templates:
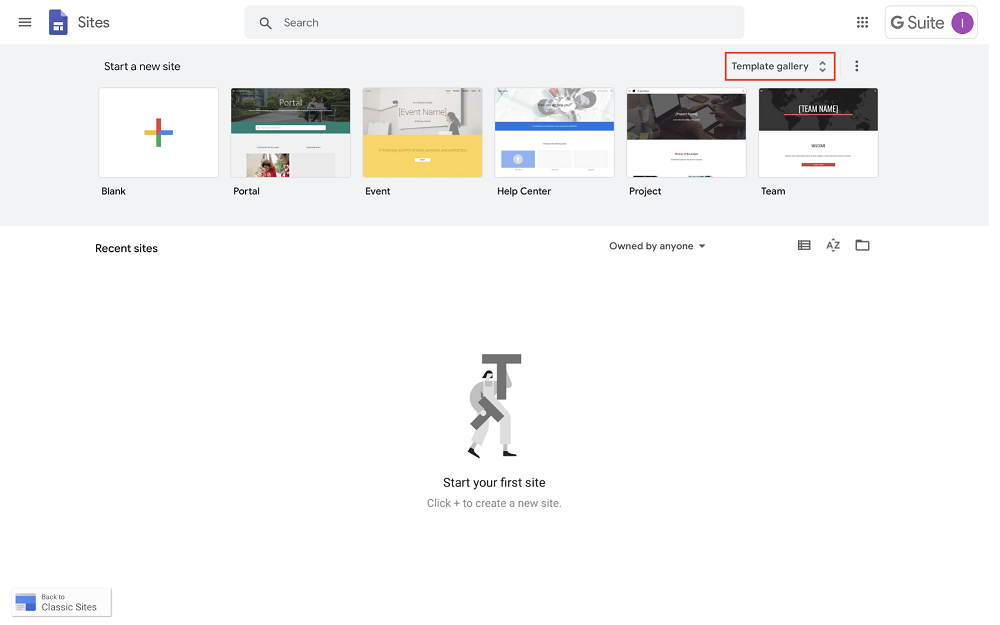
The templates range from enterprise-focused — such as the Portal template for intranets — to practical templates that small businesses can use for their websites, such as the Restaurant, Salon, and Portfolio templates:
Select the template for your site by clicking on it.
Step 3: Set Up Your New Google Site
Now when you’ve selected a template, you’ve got a skeleton for starting your website. Let’s start by setting it up with the right title. Click on the title to change the words and style:
You can also change the header image by clicking change image and either choose one of the available images in the Google Sites gallery, from an URL or Google Search, or from your own folder or Google Drive — then click select.
Click on the cogwheel to change the site navigation’s location, upload a logo and favicon, and add a tracking code for using Google Analytics:
Now the site should start to look a bit more like yours!
Step 4: Choose the Right Google Sites Theme
Themes are the easiest way to change the look and feel of your site. Simply click themes in the right sidebar to see the different theme options. Click around and test them to see which one fits you the best.
You can quickly customize the theme further by choosing one of the color schemes or selecting one of your brand colors by marking the paint jar symbol.
You can also click font style to choose between different styles:
Step 5: Add Additional Pages and Sub-pages
Now, it’s time to set up the site structure. Click pages in the right sidebar to get an overview of the site structure:
By clicking the plus sign at the bottom of the sidebar, you can choose to add a new page or a new link. Click new page and enter the name of the page, then click done.
You’ve now got a new page and can click on it in the right sidebar to adjust its settings:
For example, you can turn it into the site’s home page, duplicate it to create new pages that look the same or add a sub-page.
To adjust the site structure, you can drag and drop pages to change the order of the pages in the menu or turn a page into a sub-page.
If you want to, you can hide the page from the Google Sites navigation and instead link to it from another page. For example, here the page “News” has a sub-page called “Latest reviews.” You can choose to make the sub-page invisible in the navigation bar.
Now we want the image to take users to the sub-page. Add a link to the sub-page from the image by clicking on the image and choosing insert link.
Step 6: Add Content to Your Google Website’s Pages
Now it’s time to fill your pages with content. While the templates come preloaded with simple layouts, you’ll likely want to add to them by clicking insert in the right sidebar and then choosing the right content type.
The layouts are useful for letting you add material quickly. Add headlines and texts, or embed video, images, a map, or a view of the calendar:
You can also add the content directly to the page, drag-and-drop style. For example, you can add a document from Google Docs straight to the page by clicking Docs and then choosing the right file. Check the settings to ensure that the files you embed are visible to the users.
Step 7: Review the Site’s User-Friendliness
Once you’ve added all the pages and content you want to your site, it’s time to review it. Is it user-friendly? Is it easy to find the right content? Do you need a search box?
One great way to making a page easier to overview is by adding a table of contents:
Step 8: Add Collaborators
Now you’re ready to invite colleagues to collaborate on the site:
You can invite others by adding their email addresses as well as adjust their access. For example, you can make the draft or the published visible to anyone with the link:
Step 9: Preview Your Google Sites Website
Feeling happy with your work? Click preview to see the site before you publish it:
Switch between the different symbols to see what your site will look like on various devices:
Make any necessary adjustments, and now you’re ready to hit...
Step 10: Publish!
Your site is done! Press publish in the top right corner to share your work with the world:
You can adjust the site’s URL, decide who can access the site, and also whether you want search engines to list it or not:
Congratulations on your new site!
Is Google Sites Right For You?
Even a user that isn’t particularly tech-savvy can get a site up and running in a short time by using Google Sites. It is especially intuitive if you already have some experience working with the G Suite.
Many companies choose to use Google Sites to build simple intranets, as it is easy to manage access levels and only invite certain users. If a very basic site is all that you need, it can be a great option.
However, the simplicity of Google Sites causes its own set of limitations. The main issues are the reliance on Google’s own products — meaning that you can’t integrate other tools — and the lack of customization.
For those looking for a more powerful alternative that they can use in all areas of their business, a knowledge base is a better fit. A knowledge base lets you store, share, and edit information — all in one centralized, secure hub. This means that you won’t have to flit between Google Drive, Sheets, Docs, Sites every time you want to add a new document or manage access.
Important features of a knowledge base include:
- Powerful search functionality to find information
- Accessible editing and commenting features for document collaboration
- Analytics that show how users interact with the content
- Advanced access and security functions
- Integrations and customization options
The right knowledge base is a tool to replace many. For example, it can just as well serve as a file repository or a document collaboration platform, as an intranet or a customer support platform.
One of the main weaknesses of Google Sites is the lack of customization. But, your business has its unique needs, and the right tool should adapt to you instead of forcing you to adapt to it. Here at Helpjuice, we pride ourselves on the unlimited customization options available. We’ll even have our support team help you customize your site for you for free. Start your free 14-day trial now.
![Internal Wiki Guide: How to Create One + Best Software to Use [2023]](https://s3.amazonaws.com/helpjuice-static/helpjuice_production%2Fuploads%2Fupload%2Fimage%2F4752%2Fdirect%2F1609788064037-Internal+Wiki.jpg)


